目錄表
[FreeBSD] Use Letsencrypt on Freebsd
0x00 前言
在網路上的通訊沒有加密常常會有資安疑慮,而 self-sign 的憑證在瀏覽器因不受信任常常會跳出警告,觀感不佳
為了打造安全通訊的環境 Letsencrypt 誕生了
他提供了一個簡易且免費的方式取得受信任的憑證
還猶豫什麼,加密你的網站吧
0x01 First time to use
Step1. clone repo
$ git clone https://github.com/letsencrypt/letsencrypt
$ cd letsencrypt
Step2. get cert
# ./letsencrypt-auto certonly --standalone -d www.my.domain --debug
因為在freebsd上面 script 好像還是 beta,必須加上 --debug 才能執行
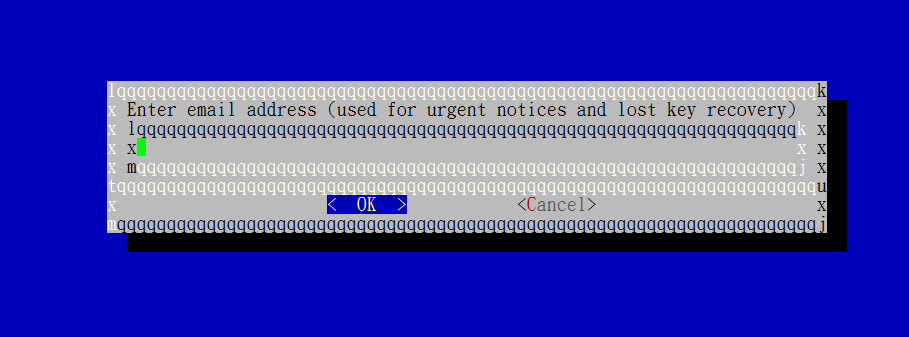
這邊他會要求你填入 email,憑證要到期時他會寄信通知
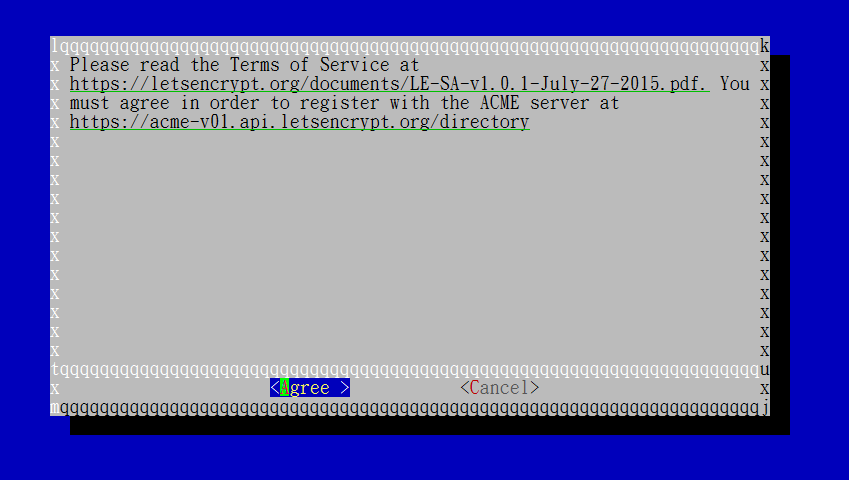
同意使用規範
這邊會用到 80 port,web server 要暫時關閉
產生的憑證檔會放在
/etc/letsencrypt/live/www.my.domain/
Step3.設定 Apache
在自己的domain中修正以下三行
# vim /usr/local/etc/apache24/extra/httpd-ssl.conf

SSLCertificateFile "/etc/letsencrypt/live/www.your.domain/cert.pem"
SSLCertificateKeyFile "/etc/letsencrypt/live/www.my.domain/privkey.pem"
SSLCertificateChainFile "/etc/letsencrypt/live/www.my.domain/chain.pem"
Step4. Reload Web Server
# service apache24 reload
0x02 Renew
由於憑證簽發有效期為90天,所以要定期 renew
過期之後網頁就會顯示不安全的憑證,google chrome 就不給連線了
重簽的作法也很簡單
# ./letsencrypt-auto renew --debug
再重簽時,letsencrypt 會從 80 port 連線至你的 domain,若有設定 pf 或安全限制或 web server 正在啟用中可能會導致重簽失敗,terminal 會噴紅字 error
這時暫時先把 pf 和 apache 停掉,簽完再重開就行了
0x03 Limit
- 每個 IP 只能在 3 小時內發送 10 次請求,如果超過 10 次就會被阻擋
- 七天內你的主 Domain 跟 sub Domain 加起來只能申請五個,當超過時,Letsencrypt 就會阻擋你申請下一個 domain 了
0x04 Delete
letsencrpty 可以簽憑證給許多不同 domain
簽了 domain 後會分別在 /etc/letsencrypt/live 產生資料夾 wiki.kshuang.me,裡頭包含 cert.pem, chain.pem, fullchain.pem, privkey.pem 等憑證檔
/etc/letsencrypt/renewal 產生 wiki.kshuang.me.conf 檔案,紀錄 renew 時的相關資訊
有時當我們換了 domain, 舊的 domain 不再需要憑證,但 renew 時這些 domain 還是會一併被更新(可能會更新失敗),所以我們需要將這些不會用到的 domain 移除
指令如下
# ./letsencrypt-auto delete --cert-name wiki.kshuang.me
如此一來前面關於 wiki.kshuang.me 這個檔案資料就會被從 letsencrypt 移除了

